Rowing Rehabilitation Protocols: Knee and Hip Recovery
By Jonas Bergström • 23rd Mar
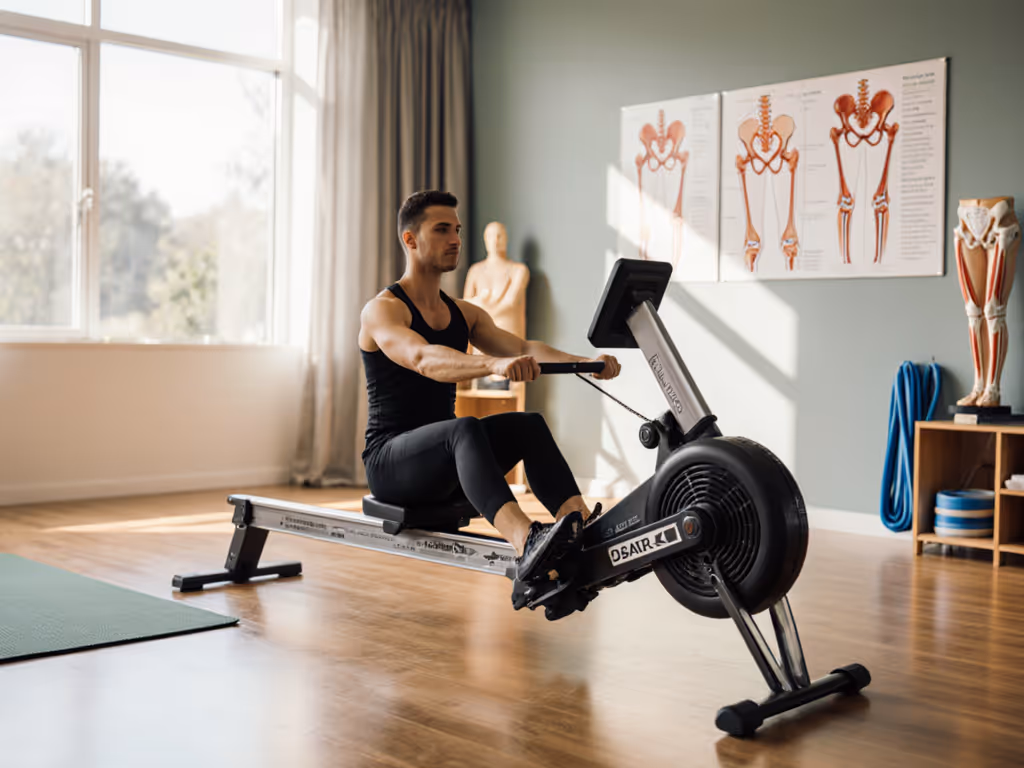
If you're recovering from a knee or hip injury, you've likely faced the frustration of choosing cardio equipment that doesn't make things worse. Many people avoid rowing machines entirely because they worry about re-aggravating pain or lacking control over their recovery progression. But when rowing rehabilitation protocols are properly tailored to your specific injury stage, the machine becomes one of the safest ways to rebuild strength, flexibility, and cardiovascular fitness without bearing weight through a healing joint.
The key difference isn't just whether to row - it's how to set up your machine and sequence your sessions so every movement supports recovery rather than complicating it. For a step-by-step overview tailored to injuries, see our rowing rehabilitation guide.
The Problem: Confusion Over Safe Rowing After Injury
Most gym-goers see rowing as a full-intensity leg-and-back movement, which makes sense for athletes chasing power. But someone six weeks post-meniscus surgery, or dealing with patellofemoral pain, faces an entirely different question: How much knee flexion is safe right now? What resistance prevents re-injury? Does the seat height matter as much as they're hearing online?
Without clear guidance, people either avoid rowing altogether or jump into full sessions and setback their recovery. The frustration deepens because rowing machines aren't one-size-fits-all - a 5'4" person and a 6'4" person need completely different foot-stretcher and rail positions to achieve the same comfort angles.
Why Rowing Works - But Only With Precision
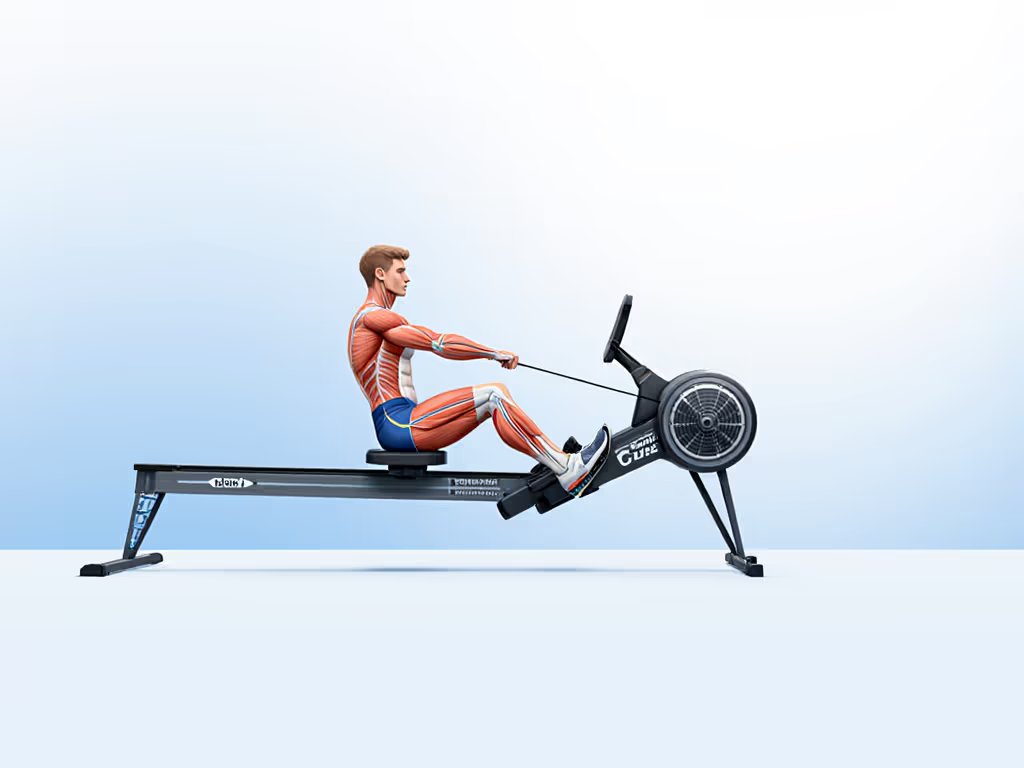
Rowing removes weight-bearing stress from your joints while still engaging the muscles that protect and stabilize them.[1] When you sit on a rower, your knees and hips aren't supporting your body weight; instead, they're working through a controlled range of motion against resistance you can adjust minute by minute.
This distinction matters deeply. The rowing stroke simultaneously strengthens your quadriceps, hamstrings, and glutes - the muscle groups that provide dynamic support around the knee and hip.[1] Research confirms that many chronic joint problems stem from imbalances between these muscles; rowing, performed correctly, addresses all of them in one coordinated pattern.[2]
The repetitive cycling of the stroke also promotes circulation of synovial fluid, the natural lubricant inside your joints, which reduces stiffness and accelerates healing.[1]
Measuring Safety: Angle Ranges and Machine Setup
Comfort you can measure becomes consistency you can trust. Instead of guessing whether a session "feels okay," you adjust specific contact points and monitor them across workouts.
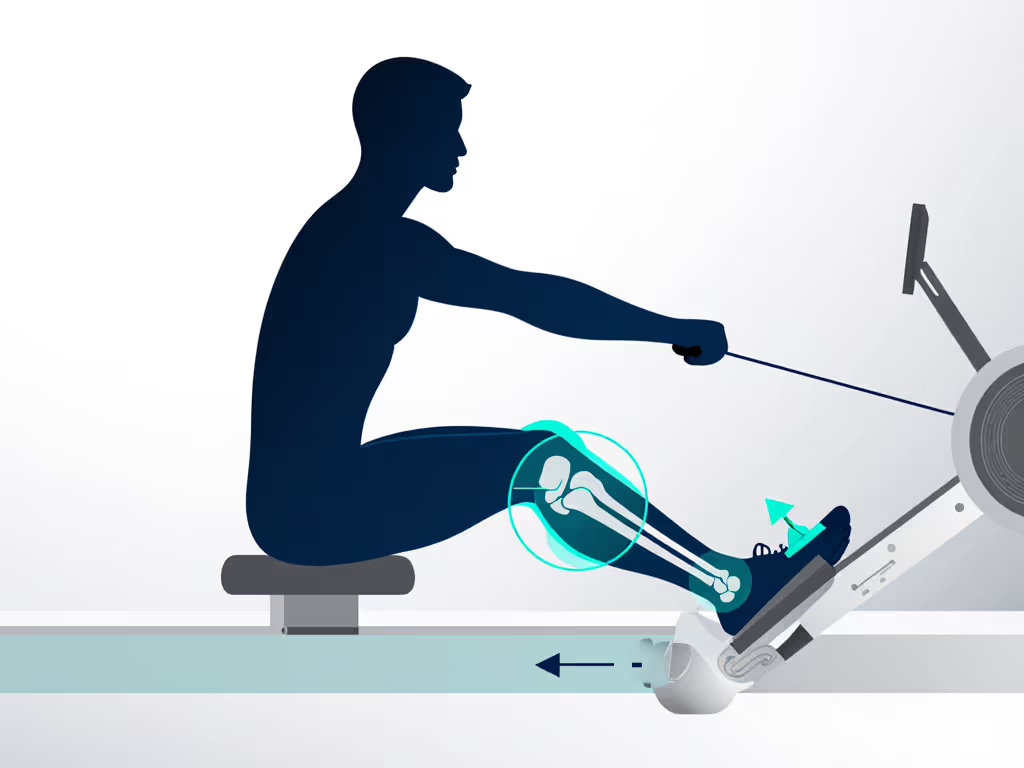
Knee Flexion: The Catch Position
The catch is the forward part of the rowing stroke, where your knees bend the most. For knee rehabilitation, avoid full compression by limiting knee flexion to roughly 70-90 degrees rather than the full 110-130 degrees you'd use in racing.[1] This single adjustment dramatically reduces stress on healing tissue.
How to set it: Sit at the rower, drive through your legs as if starting a stroke, and stop the slide before your knees travel beyond 90 degrees. Your shins should remain roughly vertical or slightly forward, never caving inward. If your foot stretchers are too high or too low, this angle becomes impossible to hit consistently. Measuring and adjusting foot-stretcher height in 0.5-inch increments often solves chronic knee tweaks that feel unrelated to the rower itself.
Hip Flexion and Seat Distance
Your hip angle at the catch - the angle between your torso and thigh - should stay in the 50-70 degree range during early rehabilitation.[2] Too tight a hip angle forces excessive knee flexion; too open, and you're overloading your lower back. Adjusting the distance between the seat and the footplate (some machines allow seat slides forward/backward) fine-tunes this contact point.
Foot Flexion and Ankle Stress
Many rowers experience ankle or calf strain that masquerades as knee pain. The foot stretcher angle - how much your ankle flexes at the catch - directly affects knee loading.[1] If your stretchers push your toes too far forward (beyond 20-25 degrees of ankle plantarflexion), you'll compensate at the knee. Adjusting the stretcher position upward or downward, or using spacers, shifts that load back to your glutes and quads where it belongs.
Plain cue: Your heel stays planted, and your toes stay neutral - not cranked downward.
Progressive Resistance: Building Strength Without Regression
Don't start rowing and immediately match your pre-injury wattage. Instead, follow a three-phase progression:
Phase 1 (Weeks 1-3): Begin with minimal resistance - what many machines label "Level 1" or "2."[1] Aim for sessions of 5-10 minutes, three to four times per week. Your focus is feel and sequencing, not power. Work through the stroke slowly: legs first, then back, then arms on the drive; reverse the order on the recovery. If you need a visual refresher, follow our four stroke phases guide. Perform at a rate of 16-18 strokes per minute to give yourself time to sense what's happening in the joint.
You should feel your glutes and quads engaging as you drive through your heels.[5] If you feel sharp pain - not just discomfort, but catching or pinching - stop and check your angles. Dull, muscle-fatigue-style sensation is what you want.
Phase 2 (Weeks 4-8): Gradually increase resistance by one level every 1-2 weeks. Extend sessions to 12-20 minutes. Increase your stroke rate to 18-22 spm. Continue monitoring knee angle and foot position; don't let fatigue compromise form. Many people skip this monitoring phase and regress because they chase intensity over consistency.
Phase 3 (Weeks 9+): Increase both resistance and duration. Your knee should now tolerate full-range rowing (if medically cleared). Introduce intervals and longer steady-state sessions. You're now using rowing for cardiovascular endurance and leg-power building alongside your recovery goals.
Comfort that removes excuses - when your setup is dialed in, a 20-minute session feels repeatable and sustainable, not something you dread or rush through.
Technique Modifications for Specific Injuries
Not all knee injuries heal the same way, and your rowing approach should reflect that.
Meniscus injuries: Limit knee flexion to 60-90 degrees throughout early recovery. Favor a shallower catch and rely more on your back swing and arms to complete the stroke. Over time, gradually deepen the catch as swelling decreases and range of motion expands.[1]
Ligament injuries (ACL, MCL): Prioritize stability before increasing resistance.[1] Ensure your knees track straight ahead, not caving inward or drifting outward. A wider foot-stretcher stance (if adjustable) can improve stability. Use video feedback or a coach's eye to confirm knee alignment.
Patellofemoral pain (kneecap tracking issues): Pay special attention to the leg drive sequencing - your glutes and quads must fire together, not sequentially.[1] Weaker glute activation often causes the kneecap to track improperly. Incorporate off-rower glute activation work: side-lying leg lifts, clamshell exercises, and hip thrusts.[2] Return to the rower only when you can feel your glutes firing strongly on each drive. For targeted drills to correct common sequencing mistakes, try our rowing form error simulator.
Hip pain or restricted hip mobility: Perform gentle hip-mobility work before rowing: pigeon pose, hip-flexor stretches, and figure-4 stretches.[2] Start with a more open hip angle (less knee compression) and gradually close it as mobility improves. Rowing itself will improve hip range of motion over time through the cyclical flexion-extension of the stroke.
Flexibility and Range of Motion Gains
Beyond strength, rowing restores functional range of motion through rhythmic movement.[1] Each stroke cycles your knee and hip through flexion and extension in a controlled manner, gradually encouraging the joint through its available range without forcing it.
Monitor your range-of-motion improvements over weeks: Can you bend your knee deeper at the catch without pain? Can you extend your leg more fully on the drive? These measurable gains signal that healing is progressing and inflammation is reducing. Many people combine rowing with dedicated stretching - particularly hamstring and calf stretches - to maximize flexibility improvements.[1]
The Role of Machine Type and Adjustability
Your rehabilitation machine should offer precise adjustability: foot-stretcher height (at least ±1 inch of adjustment), seat distance from the footplate, and ideally, seat-height adjustment. Magnetic or air-resistance machines both work; the choice comes down to your noise tolerance and neighbor relations. The critical factor is that you can dial in the angles that work for your body.
Dynamic (moving-footplate) machines can reduce catch-position impact compared to static machines, making them gentler during early recovery, though both styles work with proper setup.[1]
Monitoring Your Progress
Track session metrics that matter for recovery: stroke rate, duration, and perceived exertion - not just watts or pace. Use our rower metrics guide to choose metrics that promote consistency without flaring symptoms. Note any knee swelling or stiffness in the 2-4 hours after rowing; if inflammation spikes, you've progressed too quickly. A simple log - date, duration, rate, resistance level, how your knee felt - builds accountability and reveals patterns that individual sessions can't show.
Key Takeaways for Rowing Rehabilitation
Start with short, low-intensity sessions focused entirely on proper form and comfort metrics.[1] Limit knee flexion to 70-90 degrees during early phases. Adjust foot-stretcher and seat position so that your hip angle stays 50-70 degrees and your ankles remain neutral. Prioritize form sequencing - legs, back, arms - to protect your healing joint while building balanced strength in your quads, hamstrings, and glutes. Monitor your body's response across sessions, not just within one.
Rowing offers a rare combination: low-impact loading, multi-muscle engagement, and progressive adjustability. The difference between rehabilitation success and frustration often comes down to the detail work, measuring angles, respecting progression phases, and trusting that consistent, comfortable repetition builds the strength and stability your knee or hip needs to return to the activities you love.
Next Steps in Your Recovery Journey
If you're ready to start or restart rowing after injury, consult your physical therapist or orthopedic provider to confirm you're cleared for the intensity and duration recommended for your injury type. Once cleared, visit a coach or PT who can assess your machine setup and rowing form in real time - the difference between self-teaching and guided feedback often accelerates progress. Your local gym or rowing club may offer machine-specific tutorials that address your body's unique geometry. Consider recording short video clips of your form to review and share with your coach, especially during Phases 1 and 2 when alignment matters most.
In the meantime, explore other low-impact modalities - swimming, walking, stationary cycling - to complement your rowing sessions and prevent overuse of the recovering joint. A diversified recovery approach, tailored to your healing stage and verified by professional guidance, transforms rowing from a risk into a reliable tool for returning to full strength and mobility.
Related Articles
Training, Technique & Benefits
Rowing Drag Factor: Precision Over Damper Settings
24th Apr•11 min read

Training, Technique & Benefits
Rowing for Seniors With Balance: Safe Modifications
31st Mar•10 min read
Training, Technique & Benefits
Rowing Resistance Biomechanics: How Each Type Affects Your Stroke
11th Mar•8 min read